Friday, August 13, 2010

I have to say I was a skeptic about what the result of this experiment would be. Apparently my mother-in-law had tried this before. But when we were getting ready to go in 80s weather and she told me we were going to make homemade ice cream in our backpacks as we hiked, I definitely thought, "No way is this going to work. It's just too hot." Well I should have known better as my mother-in-law is the expert on all things camping (especially on food)! It was amazing. So, here are the instructions. Give it a try-it makes a hot hike very worthwhile!
BACKPACK ICE CREAM
1 c cream
1 c milk
1/3 c sugar
1/2 tsp vanilla
Mix-ins, if desired (ie: broken cookie or candy bar pieces, nuts, etc.)
Ice
1/2 c rock salt
2 quart-size zipper lock bags
1 gallon-size zipper lock bag
Newspaper
Tape (preferably electrical or duct tape)

In one quart-size bag, put cream, milk, sugar, vanilla, and desired mix-ins. Let all air out and seal bag. Gently massage and shake bag to mix ingredients. Place in second quart-size bag and press out air and seal. Place in gallon-size bag and fill with salt and ice. Press out air and seal. Wrap in several layers of newspaper and tape securely. Place in your backpack and go for a hike. Don't forget the spoons! This amount was perfect for 2 adults and 2 children to have a snack at the end of the hike. If you want more, don't double the recipe inside the bag, just make more bags and make everyone carry one! Thanks Holly!

Thursday, July 8, 2010

Outside Cooking . . .

So, for anyone who has not heard, the East is under a record-breaking heat wave right now. Which means my stove and oven are pretty much off-limits. Why? Well, we don't have central air-conditioning. So trying to keep our house bearably cool is difficult, and would be impossible if I was doing a lot of cooking. So we've had to be very creative and cook outdoors. It hasn't been too bad, it just takes a little more planning and work.
Sunday, we had company coming and did a butterflied chicken on the grill (wish I had taken a picture, it was beautiful), boiled potatoes, gravy, cauliflower, watermelon, and dutch-oven peach cobbler. Most of this we did outside, and it turned out great. And I turned out exhausted!
Tonight it was a little simpler and so so yummy. One of our all-time favorite recipes is Pizza Margherita. I haven't made it lately because it cooks in a 500 degree oven. But I decided to give it a try on the grill.
The recipe is in my older posts, a few pages back. It didn't take much to modify it for the grill. I used the same dough (which I love because you make the whole dough in the food processor, so fast and you don't have to get your hands dirty!). Once the dough had risen, I divided it into 8 pieces and rolled each thin, then placed between floured sheets of waxed paper.
I made the sauce according to the recipe.
Instead of cubing the cheese, I shredded it.
Preheat the grill and scrape the grates clean. Turn the burners to about medium-high. Toss on as many dough rounds as will fit on your grill and let them cook until starting to brown on bottom. Watch the first batch carefully to make sure they don't burn, since every grill varies in temperature. Once they are brown, flip them over and, working quickly, top with sauce (spread with a spoon) and cheese. Close the grill lid for just a minute or two.
When the cheese is melted and bottom side of pizza is lightly browned (or darker if you prefer it crunchier), remove pizzas to a tray or cookie sheet. Sprinkle with chopped basil, kosher salt, and drizzled olive oil. While you're finishing the pizzas on the tray, you should also throw more dough rounds onto the grill for the next batch. Enjoy. And enjoy your nice cool house!

Saturday, July 3, 2010

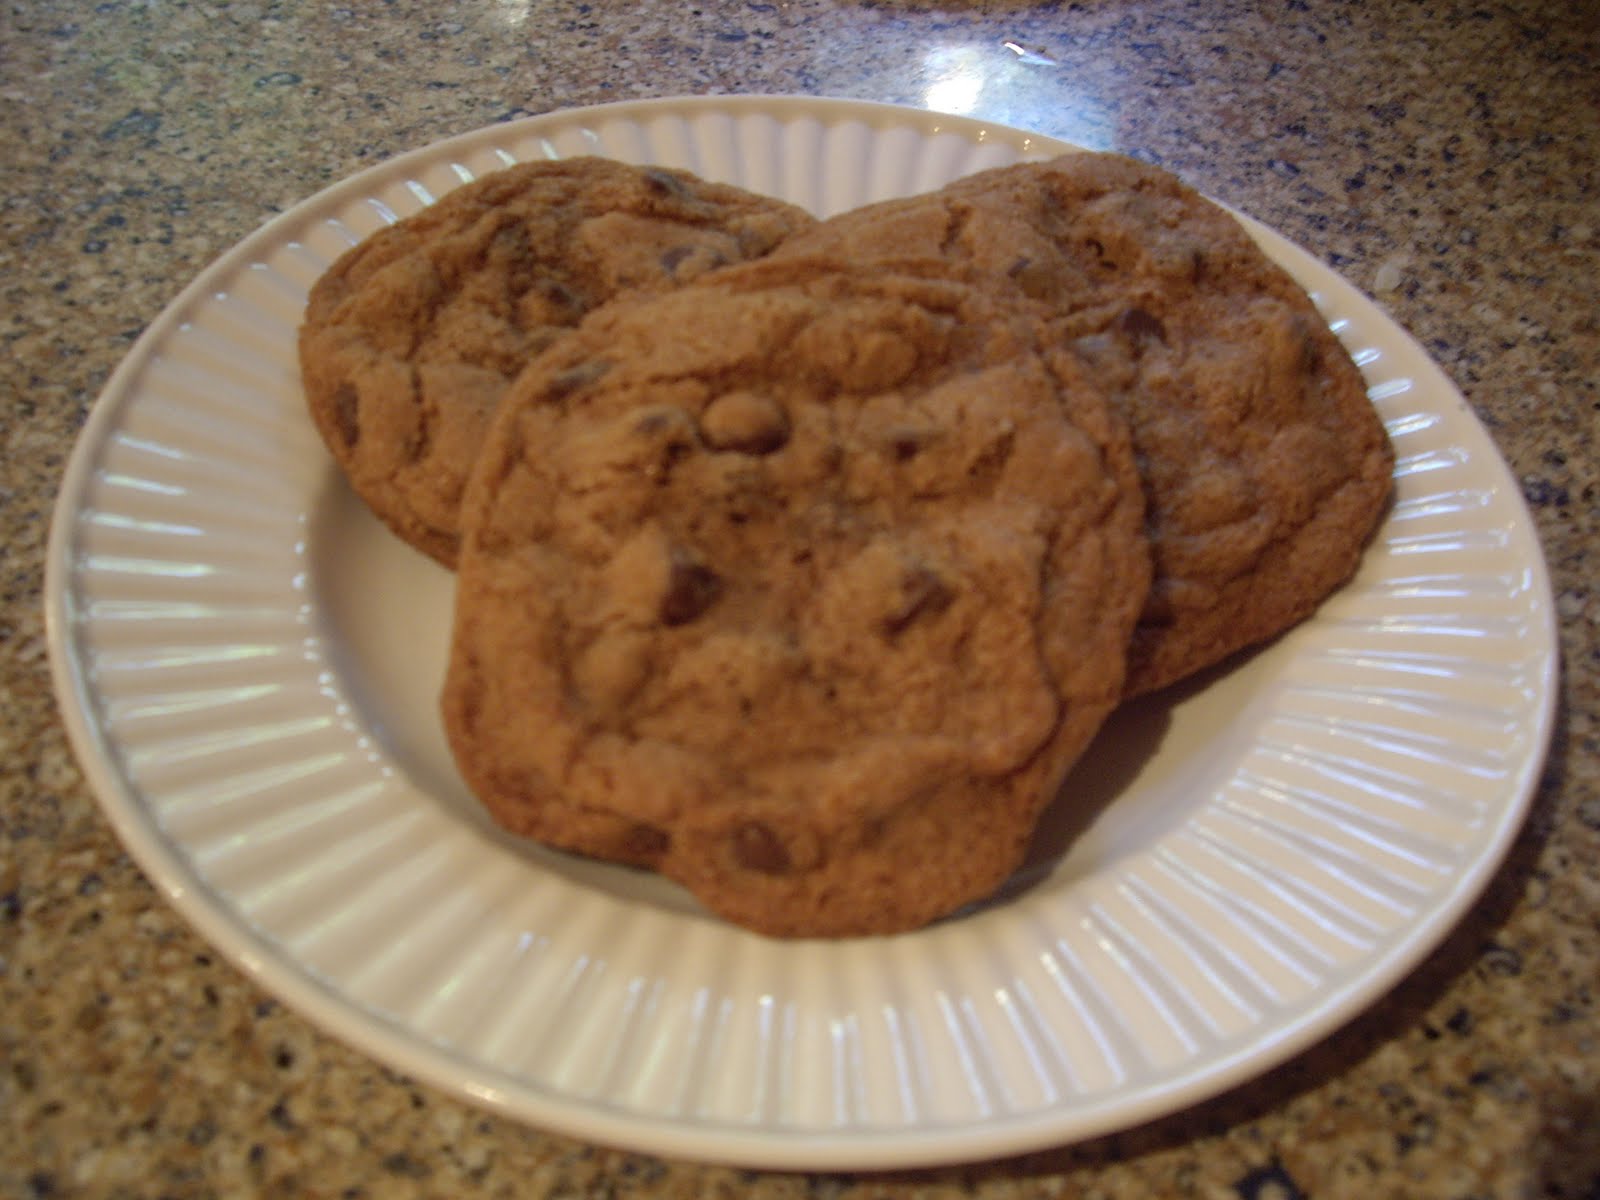
Chocolate Chip Cookies

No, these chocolate chip cookies are NOT overdone.
This comment is specifically for my dad, who is extremely picky about the "done-ness" of his cookies. When any of us bake the family-standard chocolate chip recipe, you have to watch the cookies like a hawk. Dad really likes them pretty pale. I can't blame him in a way, I don't like crunchy chocolate chip cookies. The best ones are a little crisp on the edges and pleasantly chewy and a little gooey on the inside.
So, back to these particular cookies, they are not overdone, they are brown because they are 100% WHOLE WHEAT. Yup. And guess what? They taste fabulous.
So on one of my favorite foodie blogs, I saw a recommendation for a new cookbook called "Good to the Grain". It's a cookbook with familiar recipes that are modified to include more whole grains. Well, we've been trying to eat more fruits and veggies and whole grains, so this cookbook seemed like a good choice. I really like it so far (but have only tried 3 recipes). I'll certainly post more about it as I go along. These cookies were intriguing to me the first time I leafed through the book. I love chocolate chip cookies. I keep trying new recipes, just to see what each different one is like. I honestly did not think these would be that great. Wow was I surprised. The wheat flour gives them a different texture and a sort of nutty taste, but these are both unexpectedly pleasant. It felt like kind of a grown-up, sophisticated sort of chocolate chip cookie with a really savory aftertaste that left me wanting more. Maybe it was partially the kosher salt. I have a longstanding love affair with kosher salt, but I haven't used it much in baking. This cookbook seems to call exclusively for it in all the recipes.
PS-My kids loved the cookies, too.
WHOLE WHEAT CHOCOLATE CHIP COOKIES
(modified slightly from "Good to the Grain" by Kim Boyce and Amy Scattergood)
Dry mix:
3 c whole-wheat flour
1 1/2 tsp baking powder
1 tsp baking soda
1 1/2 tsp kosher salt
Wet mix:
8 oz (2 sticks) cold unsalted butter, cut into 1/2" pieces
1 c dark brown sugar (don't substitute light brown, you really need the dark to contend with the strong wheat flavor)
1 c granulated sugar
2 eggs
2 tsp vanilla extract
1 (12 oz) package of good quality semisweet chocolate chips
Spray cookie sheet/s with nonstick spray. Heat oven to 350.
Add all dry ingredients to large bowl and whisk together. Set aside.
Add butter and sugars to bowl of standing mixer with paddle attachment. With mixer on low speed, mix until butter and sugars are blended, scraping sides of bowl if necessary. Add eggs one at a time, mixing until each is combined. Mix in vanilla. Add flour mixture to bowl and blend on low until the flour is just combined, about 30 seconds. Scrape down bottom and sides of bowl. Add chocolate chips all at once, and mix on low until chocolate is evenly combined. Scrape the batter out onto a work surface and use your hands to fully mix everything.
Scoop mounds of dough, 2-3 tablespoons depending on desired size (I liked these a little bigger, I think it helped contribute to a nice chewy center). Larger cookies will only fit about 6 to a sheet. Bake the cookies 15-20 minutes, until cookies are evenly dark brown. Transfer to a wire rack and continue to bake dough. Eat warm with milk! This recipe also halves nicely.

Wednesday, June 16, 2010

Strawberry Fields Forever . . .

A little background on me and fresh strawberries--whenever I go picking, I always pick WAY more than I think that I have. Probably due to my complete ineptitude at any type of spatial reasoning. Probably also partially due to the fact that fresh strawberries smell so amazingly good. No wonder the Beatles wrote a song about strawberry fields (although who knows how much of that song reflects actual reality).
Anyhoo, my little helper Jack and I went strawberry picking Monday. We proceeded in a very short amount of time to pick 15 POUNDS of strawberries! Yikes! But they looked great and smelled great and according to my little helper, tasted great too.
What to do with that many strawberries you ask?
Well, this is what my box looked like AFTER 3 batches of freezer jam.
So, I continued on to make 1 batch of cooked strawberry jam (you know, the kind you seal so it can keep outside of the freezer or fridge). I've never been excited about the cooked jams because the freezer jam tastes so fresh and yummy. But honestly we're at a premium for freezer space right at the moment. And the cooked jam actually tastes pretty darn good.
And here's the lovely compost bucket as testament to my efforts. P.S.--If you don't have a nice sharp little paring knife, you need one. It's one of my handiest kitchen tools.
The freezer jam sitting its required 24 hours on the kitchen sink.
Now, some information on jam-making that I discovered. I have used several different kinds of
"pectin", the stuff you use to set the jam. I don't like switching around on what I use, but for some annoying reason the stores don't always have the same kinds available. So, here's a bit on what I have learned:
PECTIN--There is actually a product named simply Pectin. It works well, the only hitch is that you have to remember that you need lemon juice in addition to your fruit and sugar. I also have not been able to find Pectin for a long time. Maybe it's not available much in the Midwest and East where I've mostly lived the last 10 years. I could always find it in Utah, but haven't looked recently.
SURE-JELL--This is the product I have used most, so I like it because I'm familiar with it. You only need the Sure-Jell, fruit, and sugar. The hitch with this one is that you have to boil the powder in a little water (3/4 cup) before you add it to the jam. Honestly for me, that really hasn't been too big of a hangup. It doesn't take long.
CERTO--I have just discovered this product and like what I see so far. I sent my husband to the store for Sure-Jell and he couldn't find any. So this is what he brought home. This is made by the same company as Sure-Jell. As far as I can tell, you end up with a similar result using either product. This product is a liquid, unlike the other two above. It actually comes in packages of 2, so it's a little more expensive, but also makes double the jam. This one, like the Pectin, requires lemon juice for many of its freezer jam recipes, but not for cooked jam. I liked the convenience of just dumping this in, no dissolving required. I used it only for my cooked jam and the jam set up perfectly so I was pleased with the product.
BALL BRAND--I am not certain if there's a product name, but there was a Ball brand pectin that I used last year. I was very unhappy with the resulting jam. If I remember correctly, you do add a little less sugar to the jam, and maybe that's a plus for some people, but the resulting product was poor. The taste was mushy, almost stewy, and quickly becomes discolored in the fridge. This is very unappealing, especially compared to other freezer jams that I can keep in the fridge for weeks with little or no change in the products appearance or taste (maybe just a little change in the consistency, it sometimes gets a little runny from being in and out of the fridge). I (guiltily) actually just got rid of quite a bit of the stuff I made last year with this product that was still in my freezer because we just didn't like it. I don't recommend this!
So, with the remnants (quite a bit!) of the berries, we made strawberry ice cream and strawberry shortcake. YUM! This post is already too long, so next time I'll share my favorite homemade Angel Food Cake recipe that we love for strawberry shortcake.
"Let me take you down 'cause I'm going to strawberry fields . . ." (The Beatles)

Monday, May 17, 2010

Lime-Coconut Cream Pie

I haven't made a cream pie for a LONG time, and this one sounded fantastic with the lime (we can't resist anything that has lime!).
LIME-COCONUT CREAM PIE
(modified slightly from Cooks Illustrated)
Crust:
6 ounces animal crackers (I like Barnums best)
2 T unsweetened shredded coconut
1 T granulated sugar
4 T butter, melted and cooled
Filling:
1 can coconut milk (full-fat, not light)
1/2 c heavy cream
1/2 c milk
1/2 c unsweetened shredded coconut
1/2 c granulated sugar + 1 T
3/8 tsp salt
5 large egg yolks
1/4 c cornstarch
2 T butter, cut into 2 pieces
1 tsp vanilla
zest grated from 1 lime (about 1 1/2 tsp)
Whipped Cream/Garnish:
1 1/2 c heavy cream (cold)
2 T granulated sugar
1/2 tsp vanilla
1 T unsweetened shredded coconut, toasted in small skillet until golden (watch carefully or it will get too toasty!)
For crust: Heat oven to 325. In food processor, pulse animal crackers, coconut, and sugar to fine crumbs, 18-20 one-second pulses, then process about 5 seconds more until powdery. Transfer crumbs to bowl and add butter. Toss with a fork until crumbs are evenly moist, then empty into 9" pie plate. Using bottom of ramekin or drinking glass, press crumbs evenly into bottom and up sides of pan. Bake until fragrant and medium brown, about 15 minutes, rotating midway through baking time. Set on wire rack to cool while making filling.
Filling: Bring coconut milk, cream, milk, shredded coconut, 1/2 c sugar, and salt to simmer over medium-high heat, stirring occasionally so sugar will dissolve. In medium heavy bowl (a heavy bowl will make it easier to quickly whisk the mixture while tempering the eggs), whisk yolks, cornstarch, and remaining 1 T sugar until well combined. To temper the eggs: gradually ladle about 1 cup of hot milk mixture over egg mixture, whisking briskly and constantly until combined. Whisking constantly, gradually add remaining most of remaining milk mixture to eggs, then return mixture to saucepan and cook until thick and mixture just boils, whisking constantly, about 1 minute. Off heat, whisk in butter, vanilla, and zest until butter is fully incorporated. Pour hot filling into shell and smooth surface with spatula. Press plastic wrap directly against surface of filling and refrigerate until firm, at least 3 hours and up to 12 hours.
For topping: Just before serving, beat cream, sugar, and vanilla with electric mixture until soft peaks form. Top pie with cream and sprinkle with coconut.
The milk mixture with the unsweetened coconut. If you're not familiar with it, you can usually buy it in bulk sections of the supermarket or whole foods store (next to the nuts, grains, and granolas in my store). Using this instead of the bagged sweetened coconut makes it so the pie is not overly sweet.
The cooling crust waiting for the filling.
The egg mixture, ready to be tempered. It's a fairly thick mixture so it's a little tricky to whisk quickly, but very important!
The almost-complete filling with the lime zest added.
The beautiful finished pie right before serving. We really liked this dessert, my only complaint (because I have a MAJOR sweet tooth) is that it could have been a tad sweeter, but I think everyone else liked that it wasn't so sweet. The lime flavor was very subtle, next time I might even try and mix a little lime juice with the filling or cream topping. We'll see . . . !

Friday, May 7, 2010

The Truly Delicious "Big Mouth Burger"

Well, the warmer weather means my favorite season--Grilling Season! We do try and grill as much of the year as we can but it's much more enjoyable in nice weather!
One of our favorite things to grill is homemade burgers. I truly believe these are some of the best burgers I have ever eaten. Combined with the homemade hamburger buns (see my earlier posts), they simply can't be improved upon!
GRILLED CHEESEBURGERS
(modified slightly from The Best Recipe Grilling and Barbecue from Cook's Illustrated)
1 1/2 pounds hamburger (I don't recommend it any leaner than 85% for grilling!)
1 tsp (or to taste) kosher salt
1/2 tsp (or to taste) freshly ground black pepper
1/2-3/4 c cheddar cheese (can use other cheese if desired: blue, feta, monterey jack, etc.)
Place hamburger in large bowl. Break up with your fingers so the meat is loose. Add salt, pepper, and cheese. Mix gently with your fingers until combined. Divide into burgers (this amount of meat for us usually makes about 4 good-sized burgers). Shape into 1/2-3/4" burgers gently, pressing meat so that it holds together but is not tightly packed. After each burger is formed, lay on a flat surface and press gently into the center of each burger a slight but definite circular indentation (about 1/2" circumference). The purpose of this is to make the center of each burger slightly thinner than the rest of the burger so the burger will cook at a uniform rate. After preheating and cleaning grill, cook each burger about 3 minutes on each side. Do NOT press down on hamburger with spatula during grilling. Serve immediately with your favorite condiments and toppings (some of our favorite toppings are tomatoes, pickles, avocados, mushrooms, lettuce). Tell me if it's not one of the best burgers you've ever had.

Sunday, May 2, 2010

Update on Homemade Naan . . .

I know I haven't posted in a while . . . life just gets crazy and some things have to go by the wayside! I have a couple of posts I will sit down and work on soon, but wanted to give an update on the homemade naan bread from the shakshuka post. The recipe I listed makes a TON of dough, enough for 16 large pieces of naan. This is way too much for my family, and you can half the recipe, but it was too much of a pain for me last time. So, AFTER rising, I divided the dough in two, wrapped one half securely in press and seal wrap and stuck it in the freezer (I labeled it, too, because I don't know about your freezer but sometimes there are a few mystery items . . . ). Last night I wanted shakshuka again but didn't have the time to make the dough. So I took the frozen dough out, let it sit on the counter for a while (maybe 45 minutes), then divided it into 8 and rolled and cooked the naan according to the original recipe. When I divided it, some pieces were fairly cold and a tiny bit frozen still, but working with it warmed it up and when I rolled it, it was just fine. I was pleasantly surprised, the resulting naan was great, the only difference between the fresh dough was that the frozen resulted in slightly chewier naan, but it was still tasty and DEFINITELY worth the time/work savings for last night's dinner.
You can freeze other doughs, I've had varied results with them. Pizza dough tends to work out okay, bread dough is okay but I don't think it's as light with frozen/thawed dough. Just make sure if you're going to freeze dough that you do it AFTER the initial rise.
Enjoy!